

If you have a problem in sending mails with your WordPress blog? Trust me you are not alone over 1 million sites having the same problem and using WP Mail SMTP to fix their email deliverability issues.
WP Mail SMTP is a most popular WordPress plugin out there, and it’s a free SMTP WordPress plugin. In this tutorial help you out how to fix email issues and how to set up WP Mail SMTP.
Table of Contents
How to fix Email deliverability issues
Using SMTP(Simple Mail Transfer Protocol) can fix the email deliverability issues on your site. SMTP requires proper verification and secure authentication to prevent email spoofing, and it’s trusted email service providers like Gmail, Yahoo! and Outlook.
Advantage of using SMTP
- It’s easy to configure
- Manage your Email traffic
- Reliability – If your Email is not delivered successfully, the SMTP server always try to re-send that Email until its successful.
- Offers end-to-end flow control, and more.
The WP Mail SMTP is can connect many SMTP services in a flexible way. You can setup WP Mail SMTP with below the list.
- Gmail
- MailGun
- SendGrid
- Other SMTP
It’s the best SMTP WordPress plugin. It’s developed by the team behind popular WordPress plugins WPForms, MonsterInsights, and OptinMonster.
How to Configure Gmail with WP Mail SMTP
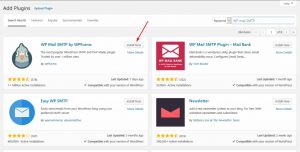
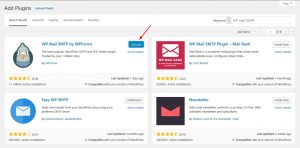
Now let’s see about how to configure WP Mail SMTP in Gmail. The first thing we need to install the WP Mail SMTP plugin. If you want to install a free version of the plugin go to Plugins -> Add new -> search WP Mail SMTP and install.
After complete installation just activates it.
Go to plugin setting in the WordPress dashboard.
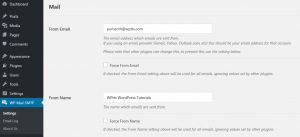
Now you can see your admin email address and website name in settings its a default, you can change from email and from name whenever you want.
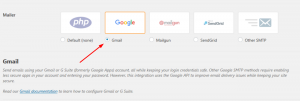
In below the section you can see mailer option in the plugin settings.

PHP is the default mailer system in our blog. But most of WordPress users are using Gmail/G-Suite, Mailgun and Sendgrid in their sites. Now we look up into how to integrate Gmail/ G Suite.
Select the Gmail option in the plugin settings.
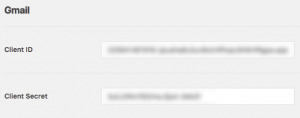
Now you should see a new section appear when you click Gmail. Those two fields are Client ID and Client Secret.
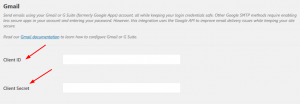
To get information about these fields you’ll need to create web application throughout your Google account. Let’s see how to create those.
Create a Web Application
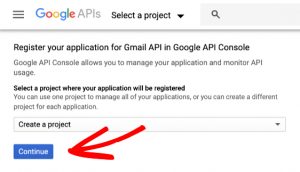
First, we need to sign in with your Google account to create a web application. Click the link and logged in to your Gmail account. Now you can see the name “Register your application for Gmail API in Google API Console”, leave into the default option and create a project.
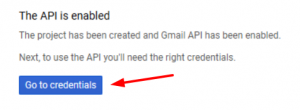
After click “continue” on the screen that says ” API is Enabled”, then click Go to Credentials button.
Next page will be an “Add Credentials to your project“. Now select the dropdown options like:
- Which API are you using? – Gmail API
- Where will you be calling the API from? – Web server (e.g. node.js, Tomcat)
- What data will you be accessing? – User data
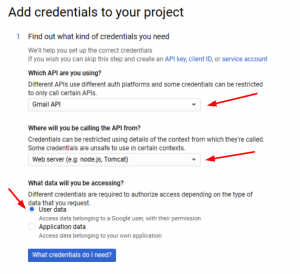
Once you set these fields click “What Credentials do I need?” button. Then you will get a popup like a setup consent screen, click on the setup consent screen.

After that, a new tab will be open and you’ll see some settings. If you have a Gsuite account, select into the internal.
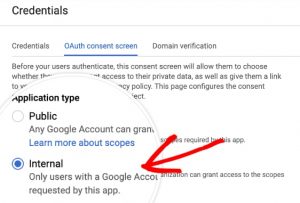
You will not see this option if you’re using an @gmail.com email account. For application name field you can add your website name.

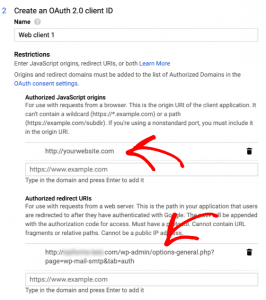
Now go to authorized domain section and add your website URL and be sure not include http:// or https:// here.
In Application Homapage link, Application Privacy Policy link and Application Terms of Service link just add your website URL no need to create special pages for that.

When it’s all done just click on the Save button.
Now you are ready to create an OAuth Client ID. It gives permission for your website to use Gmail account to authenticate emails.
Just enter a name on the field or leave it on default. After that, we need to enter the Authorized Redirect URL. In WP Mail SMTP settings in your WordPress dashboard you can see that exact URL.

Copy that URL and go to Google APIs page and paste it into the field under Authorized redirect URIs.
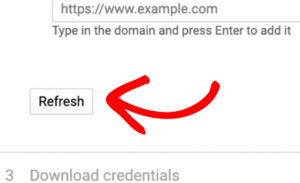
After entering those fields just click the Refresh button.
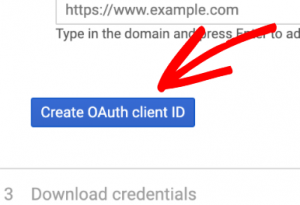
Now click the create OAuth Client ID button.
Skip the next step.
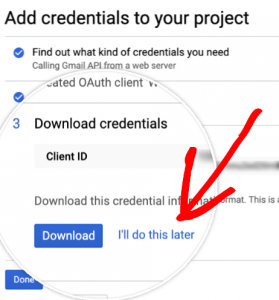
Now you’ve successfully created a Google web application.
Grant Permissions and Send Test Mails
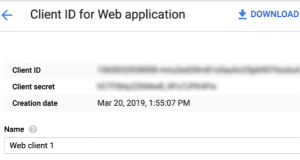
In credentials page, you can see the web application details. To see details of Client ID and Client Secret, click the pencil icon.

In the new page, you can see the Client ID and Client Secret and copy that.
Go back into the WP Mail SMTP settings in your WordPress dashboard paste on those respective fields.
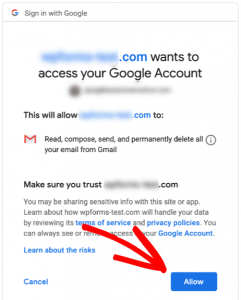
Just click the “Allow plugin to send emails using your Google account” button.
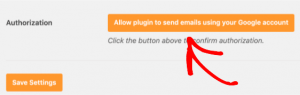
When its done click the allow button.
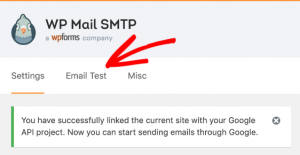
After that you’ll be returned to your WP Mail SMTP settings and success message will be displayed.
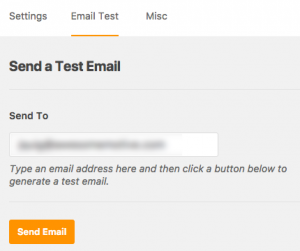
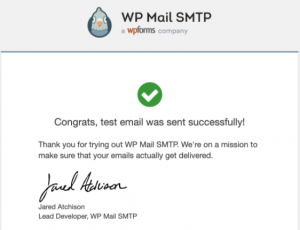
Now it’s all done you’re ready to send a test mail.
Now enter any email address to test.
When your test mail sent you’ll see a success message.
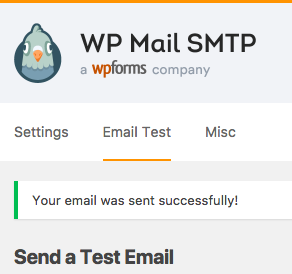
And you’ll receive test mail.
That’s all now you know about how to configure Gmail with WP Mail SMTP. Still, if you got any issues you can contact plugin support team.
Get Started with WP Mail SMTP Pro
You can get a premium version of WP Mail SMTP to click the link. And it’s come with 14 days money-back guarantee. If you’re not happy with that you can get a 100% refund.
So why are you waiting for? get started with WP Mail SMTP.
I hope you found this post helpful and enjoyed the read. If you did, please consider sharing this post with your friends, businesses, and fellow bloggers on social media. If you have any question just comment below.